AWS Lightsail is like your own little slice of the cloud. It’s handy when you want to host a website, set up a blog, or run a small app without dealing with all the complicated stuff. With Lightsail, you get a virtual server, storage, and networking all packaged up in a simple way. It’s perfect for beginners or anyone who just wants to get something up and running quickly without a headache.
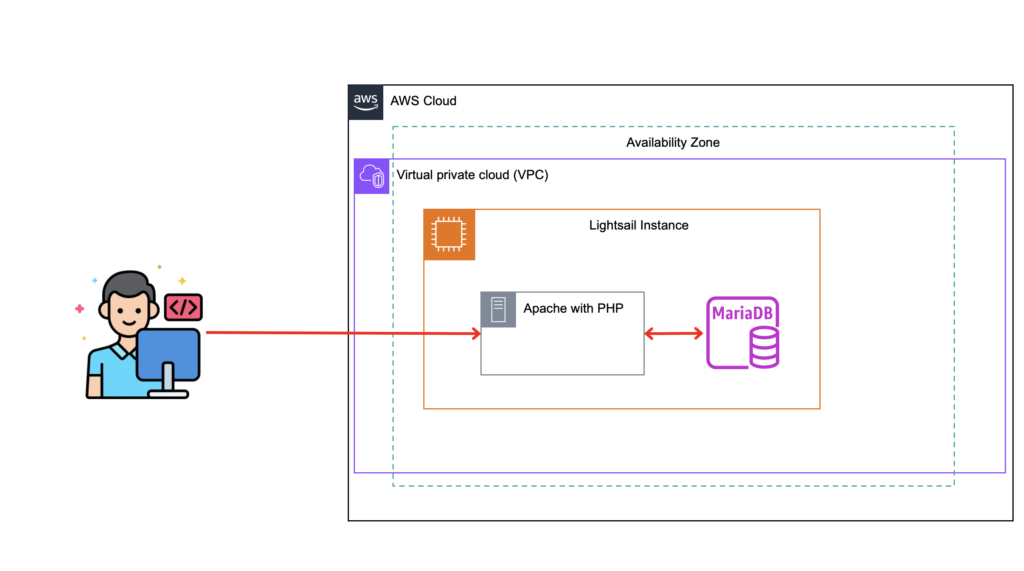
About this tutorial:
- You start by deploying a new Lightsail instance that includes Apache, MySQL, and PHP preinstalled.
- Then, you add the demo application code.
- When you’re done, you will have a solid understanding of how to use Lightsail to quickly stand up a multi-tier web application.
- This project is suitable for Beginners and it takes around 10 mins to complete.
What is AWS Lightsail anyway?
Amazon Lightsail is one of the easiest ways to get started on AWS. It offers virtual servers, storage, databases, and networking, plus a cost-effective, monthly plan. You can check further details about it from the AWS official website at https://aws.amazon.com/lightsail/
In this project, I will deploy a LAMP (Linux + Apache + MySQL + PHP) stack application onto a single Lightsail instance. As you desire, there are other blueprints available, such as MEAN stack (MongoDB + Express.js + Angular.js + Node.js.), WordPress, Joomla, Drupal etc.
Getting Started
Step 1: Create an Amazon Lightsail account
→ If you don’t have one already, create a free AWS account.
Sign in to your account, and navigate to the Lightsail home page.

Step 2: Create an Amazon Lightsail instance
In this section, you start the process of creating an instance by choosing the AWS Region where you want your demo application to run.
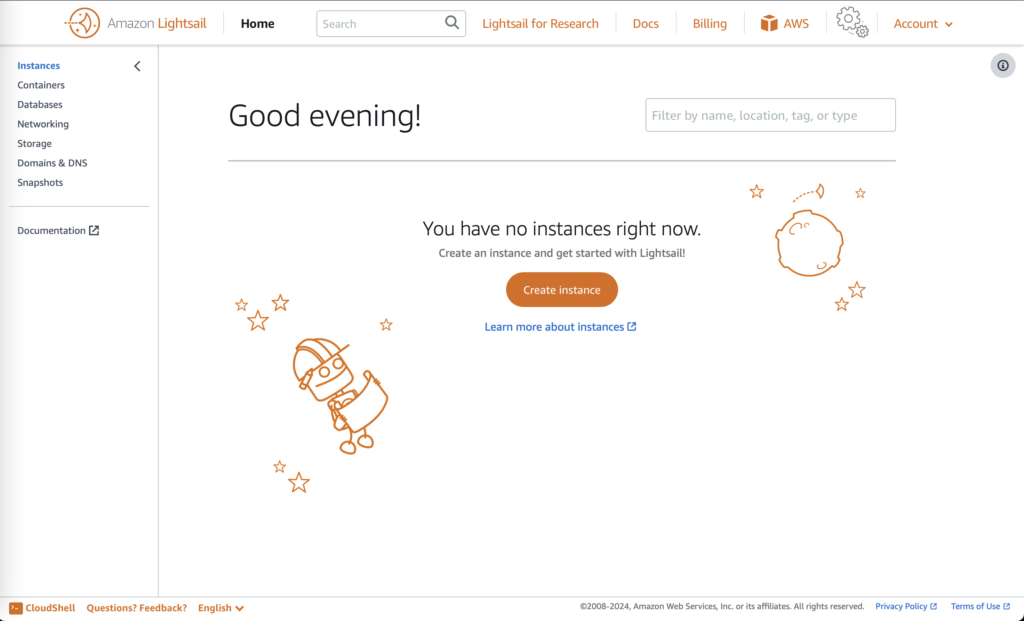
An AWS Region and Availability Zone is selected for you. Choose Change AWS Region and Availability Zone to create your instance in another location.
In this instance, I will choose us-east-1 region and Zone-A
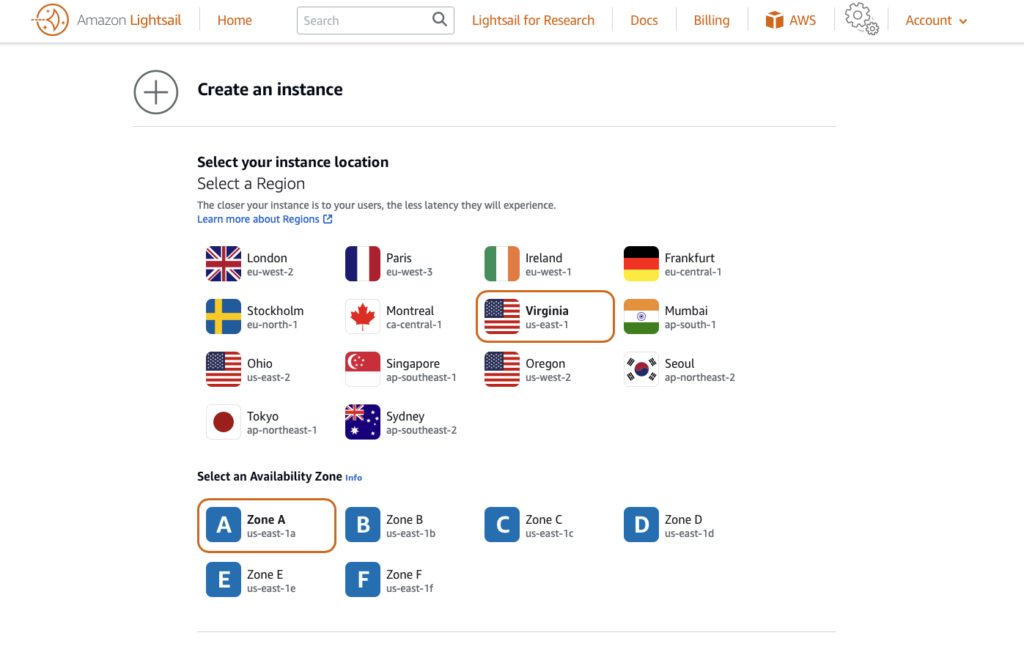
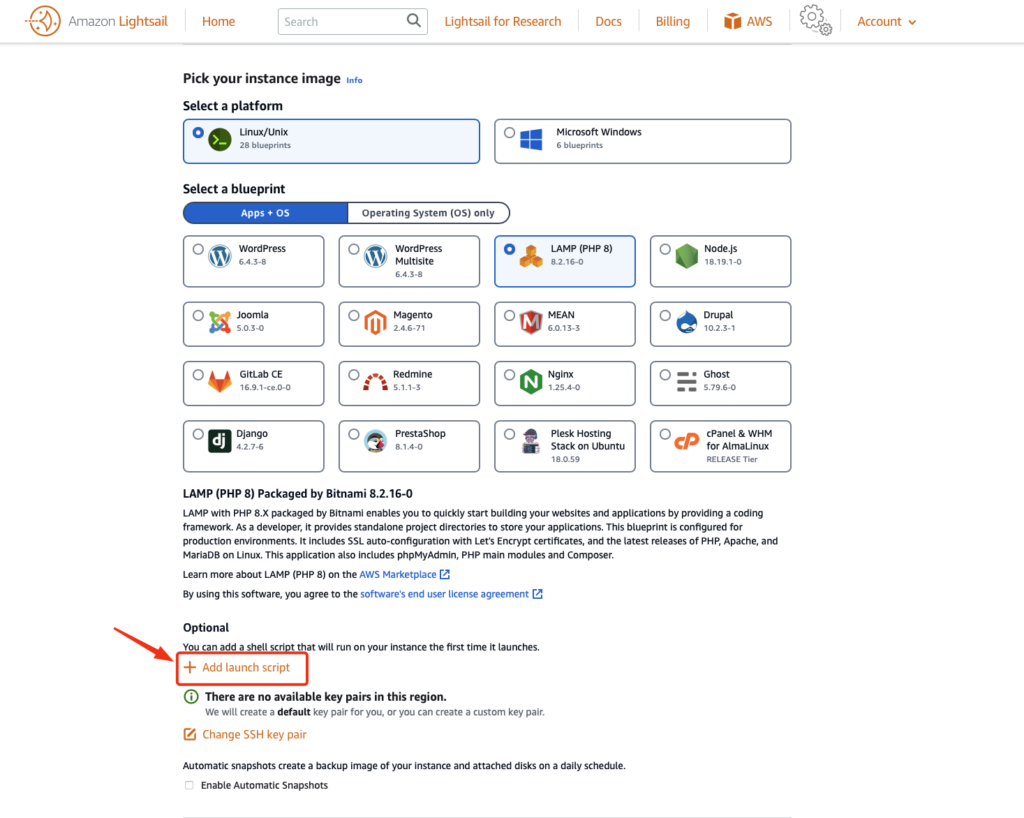
Retain Linux/Unix as the platform and under Select a blueprint choose LAMP.
💡 Additionally, you choose the LAMP Blueprint. Blueprints are preconfigured instance templates that include the core services your application needs to run – in this case, Apache, MySQL, and PHP.
At the time of writing this article, the PHP is at version 8.2.16-0.
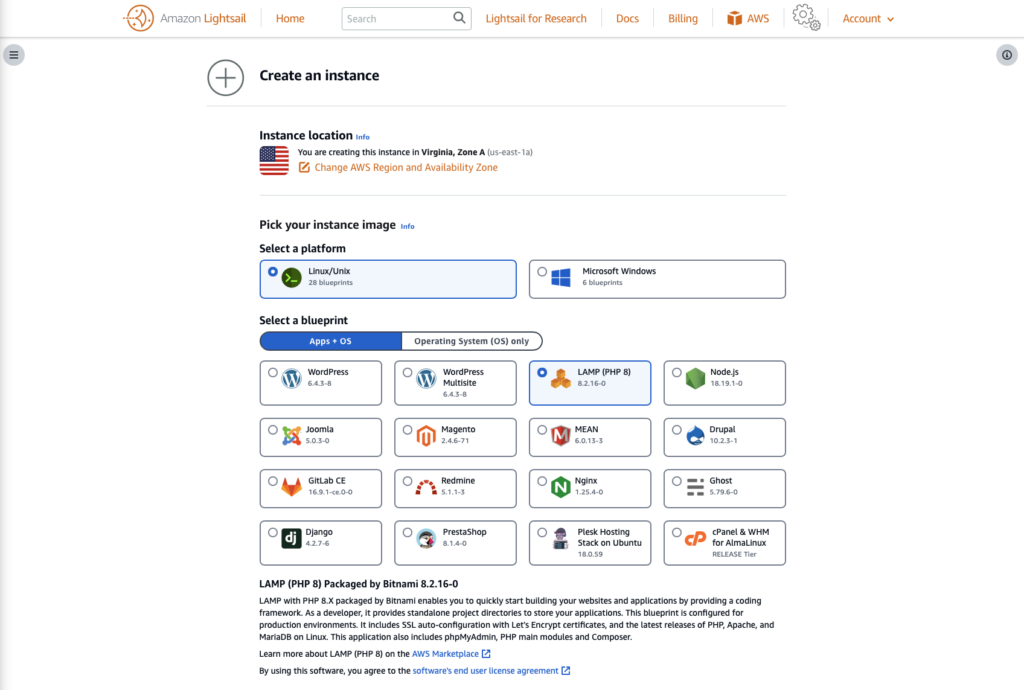
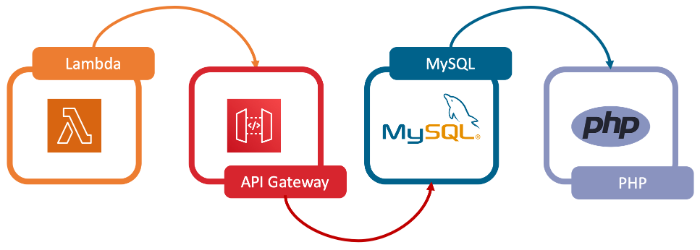
💡 What is a LAMP stack? A LAMP stack is a bundle of four different open source software technologies that developers use to build websites and web applications. LAMP stands for Linux (the operating system), Apache (the web server), MySQL (the database server), and PHP (the programming language). Developers use LAMP stacks to create, host, and maintain web content. It is a popular solution that powers many of the websites you commonly use today.
Step 3: Install the application code
In this section, you use a launch script to install the demo application. Launch scripts run the first time an instance boots up, and are used to do any initial configuration on an instance.
Choose +Add launch script.
Use the following script
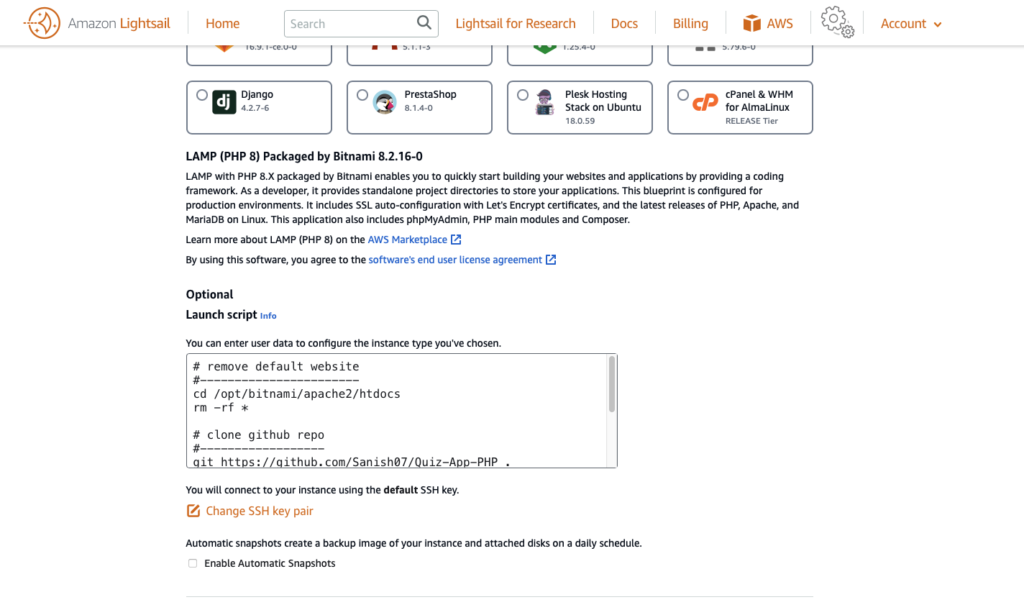
# remove default website
#-----------------------
cd /opt/bitnami/apache2/htdocs
rm -rf *

# clone github repo
#------------------
git clone <https://github.com/Sanish07/Quiz-App-PHP> .

# set ownership
sudo chown -R bitnami:daemon *

# restart the apache
#----------------
sudo /opt/bitnami/ctlscript.sh restart apache
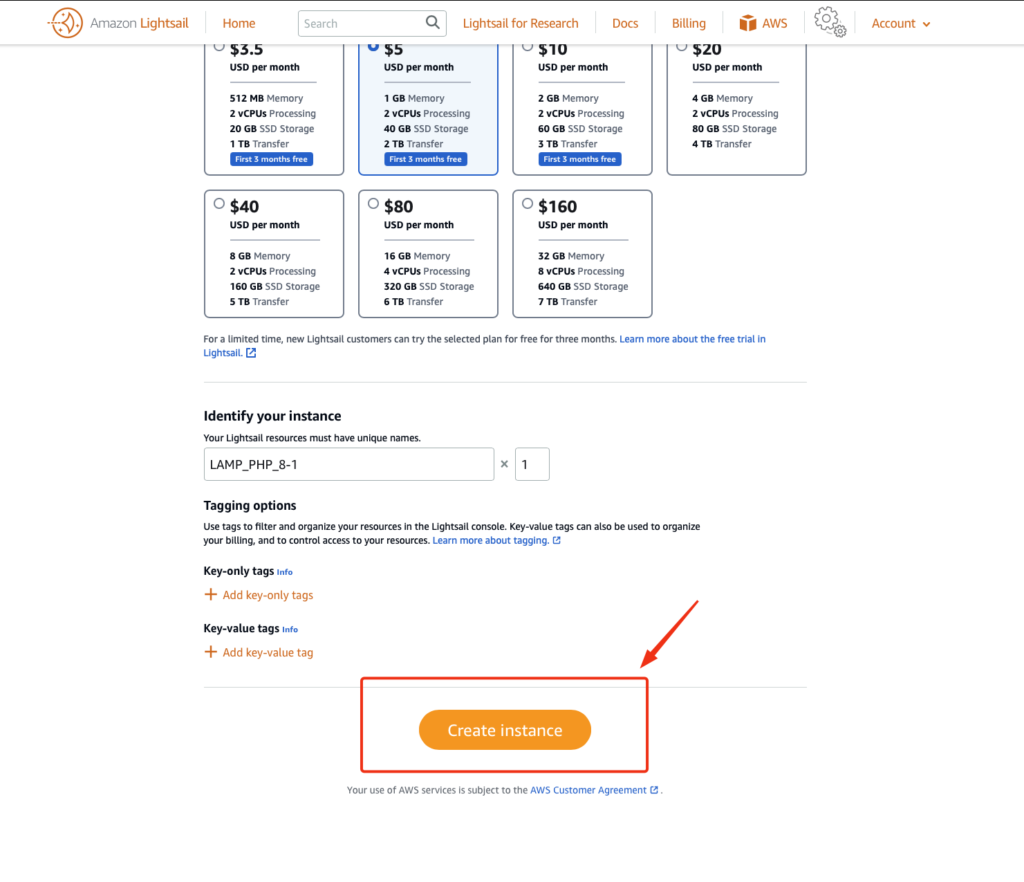
After that chose the desired compute capacity based on the need of your project.
For this example project, any option listed below are sufficient.
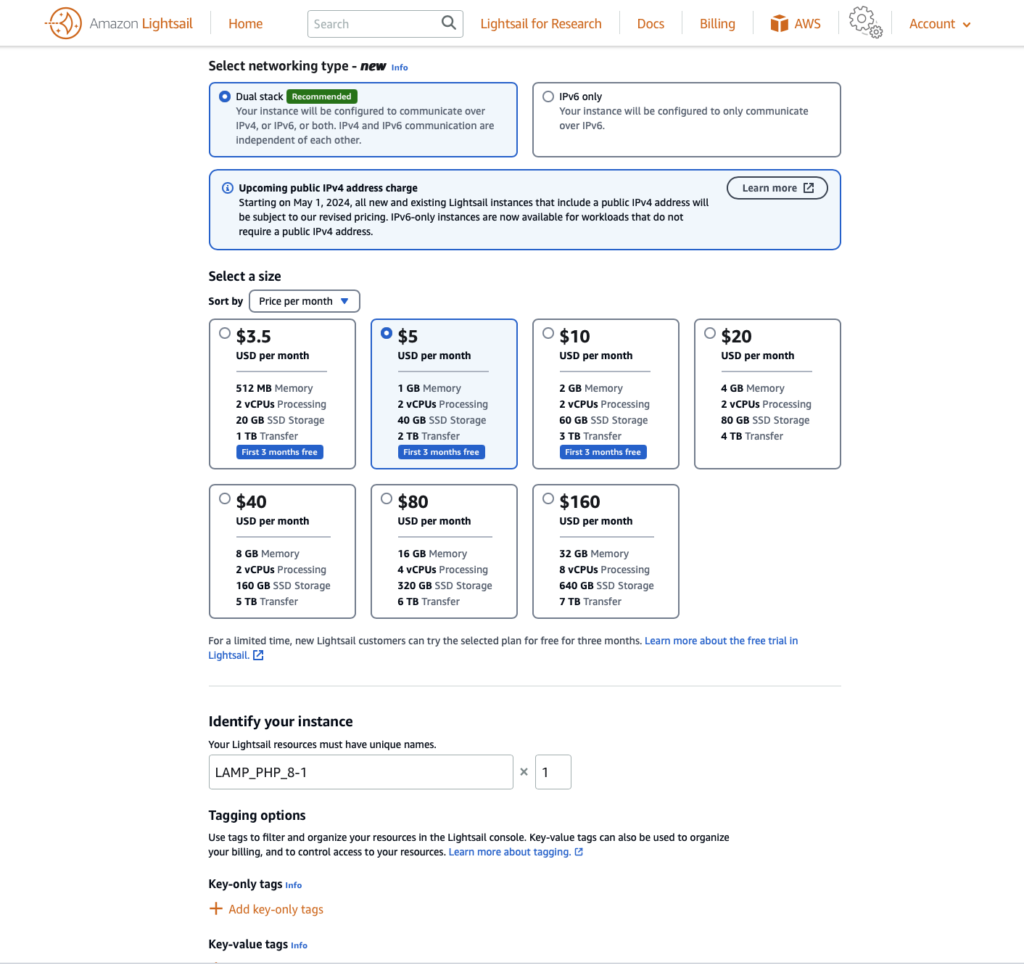
We are ready to initialise the instance.
Step 4 : Test the application
Based on the instance plan and installation steps, instance startup process is expected to take around 2-3 minutes before become fully ready.
Note: You might need to refresh your page in case the instance doesn’t move to Running state.
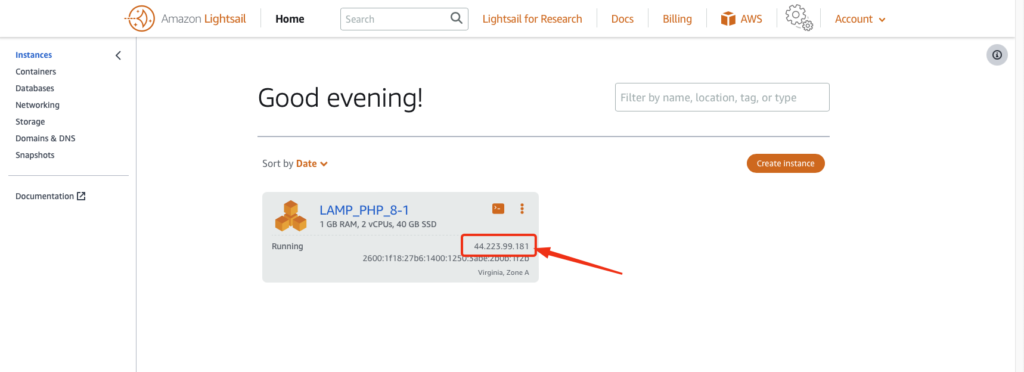
Copy the Public IP address.
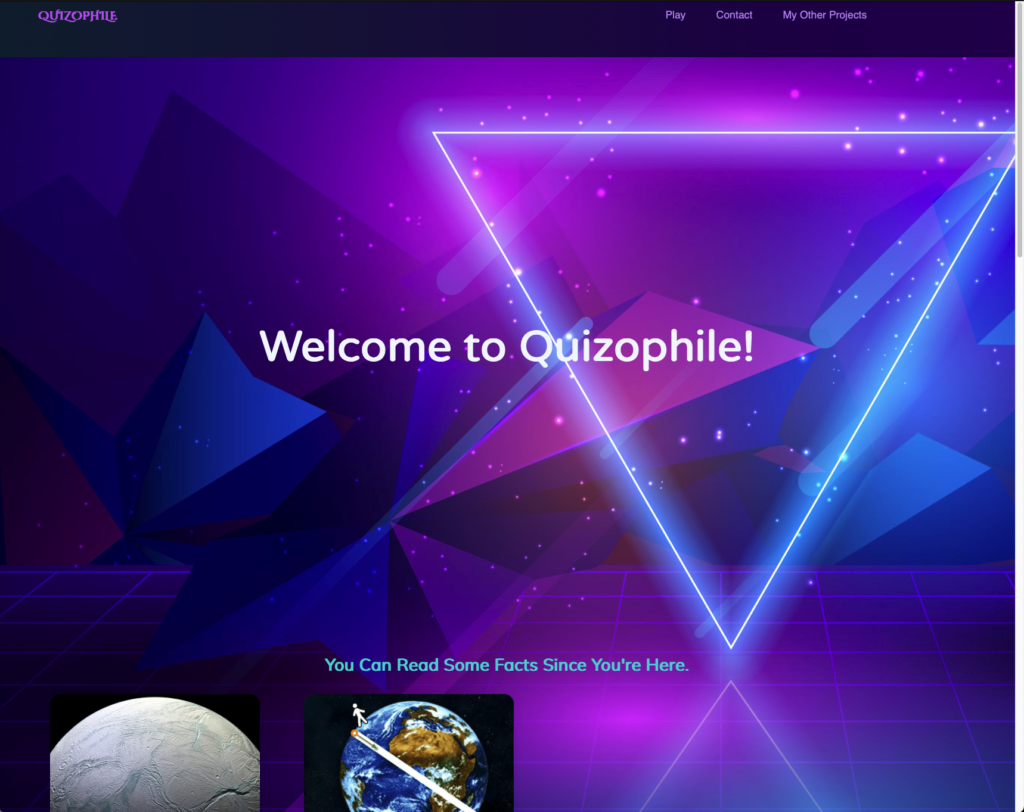
Paste the following in your web browser <ip-address>/home.php
The following page should appear on your screen.
Step 5: How to Debug
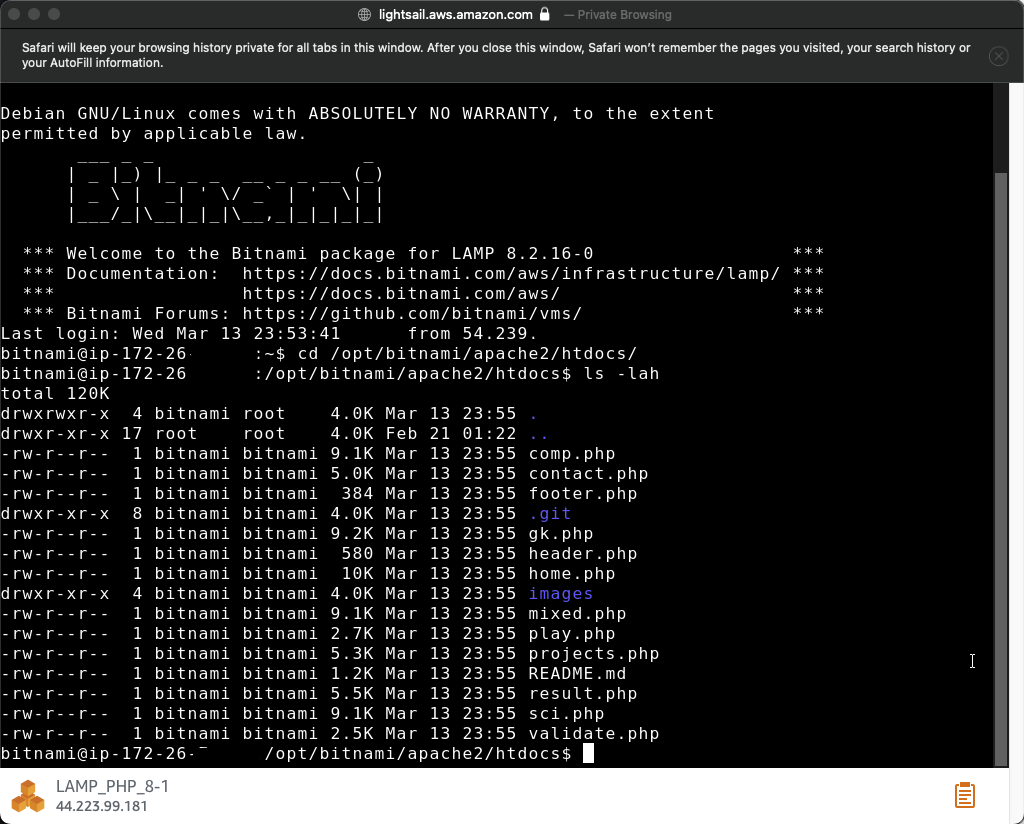
In case you haven’t seen the webpage, you can connect to the instance and investigate the cause of the problem.
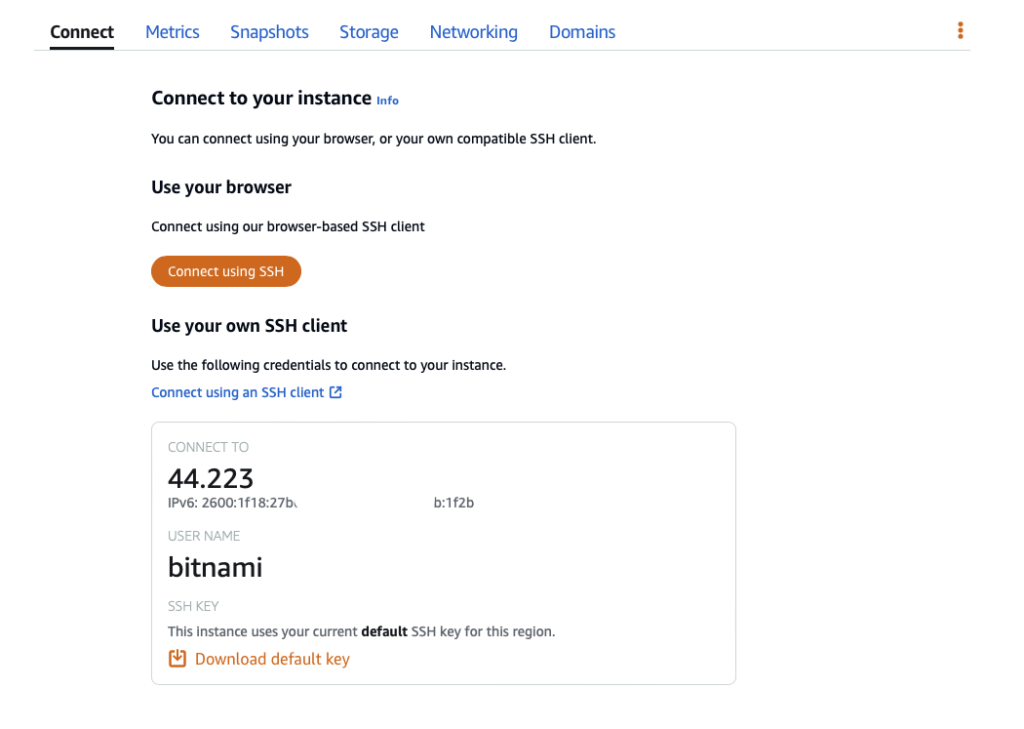
The easiest way to connect to an instance is to use the web shell which can be accessed via the button on the right corner of instance.

Alternatively you can click on the 3 dots (kebab menu) to see the further details of the instance.
From there you can download the ssh key to connect from your own terminal.
Navigate to /opt/bitnami/apache2/htdocs/ and inspect whether the files are downloaded from the Github repository.
Serdar Baran
As businesses increasingly rely on cloud infrastructure, securing it with best practices becomes crucial to building the future of technology. – that’s where I come in.
With a strong foundation in cloud security best practices, network security and architectural design, I provide cloud infrastructure solutions tailored safeguard your digital assets against evolving cyber threats.
Let’s connect and discuss how we can collaborate to create secure and efficient cloud solutions.