Ever wished your S3 bucket could do more than just store data?
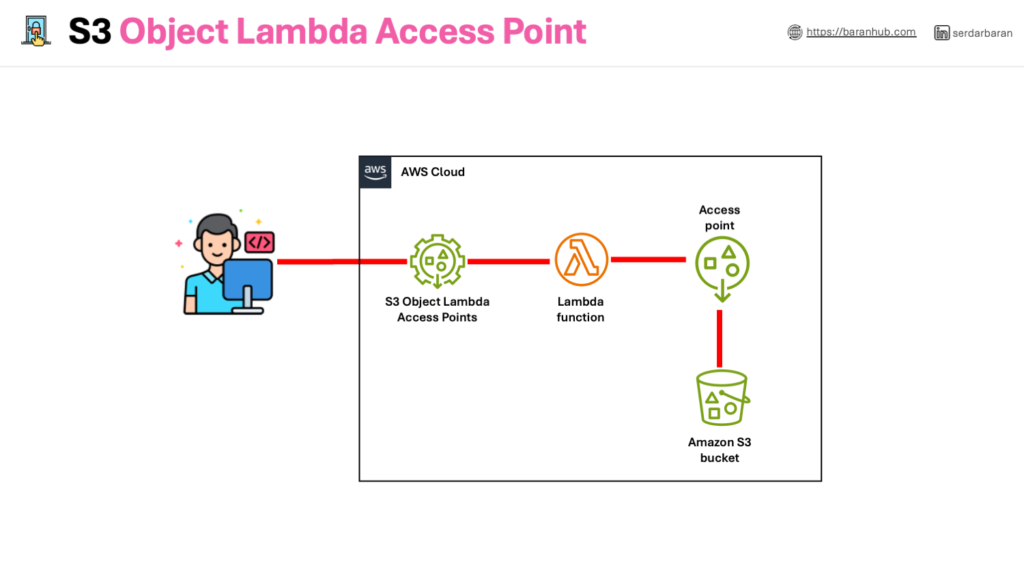
An S3 Object Lambda access point acts as an intermediary between S3 objects and your application. It triggers a Lambda function whenever a request is made to access an object through the access point. This allows you to process the S3 object data on-the-fly before it’s delivered to the application.
Here are some key benefits of using S3 Object Lambda access points:
- Automated Processing: No need to write complex code for each data retrieval. S3 Object Lambda automates the processing based on your pre-defined Lambda function.
- Flexibility: You can customize the processing logic within your Lambda function, allowing for tailored data manipulation for different needs.
- Cost-Effective: Since Lambda functions are serverless, you only pay for the time and resources they use during processing.
In essence, S3 Object Lambda access points enhance the functionality of S3 by enabling serverless processing of object data directly within the storage layer.
In other words, with S3 Object Lambda, you can add your own code to process data retrieved from S3 before returning it to an application.
Learning Objectives
In this tutorial, I will demonstrate how to add custom code to standard S3 GET requests to modify the requested object retrieved from S3 so that the object suit the needs of the requesting client or application.
As an example, I will show how to transform all the text in the original object stored in S3 to uppercase through S3 Object Lambda.
Upon completion of this tutorial, you will be able to:
- Create an Amazon S3 Access Point
- Create an Amazon S3 Object Lambda Access Point
- Configure an AWS Lambda function to automatically transform data retrieved from an Amazon S3 bucket
Getting Started with S3 Object Lambda:
Here’s a high-level overview of the steps involved:
- Create a Lambda Function: Define the logic for processing your S3 data using AWS Lambda. You can choose from various programming languages like Python or Node.js.
- Configure S3 Object Lambda Access Point: In your S3 bucket settings, create an access point that points to your Lambda function. This acts as the trigger for data processing.
- Update Application Configuration: Modify your script or application to use the access point ARN (unique identifier) instead of the S3 bucket address directly. This ensures data retrieval goes through the processing pipeline.
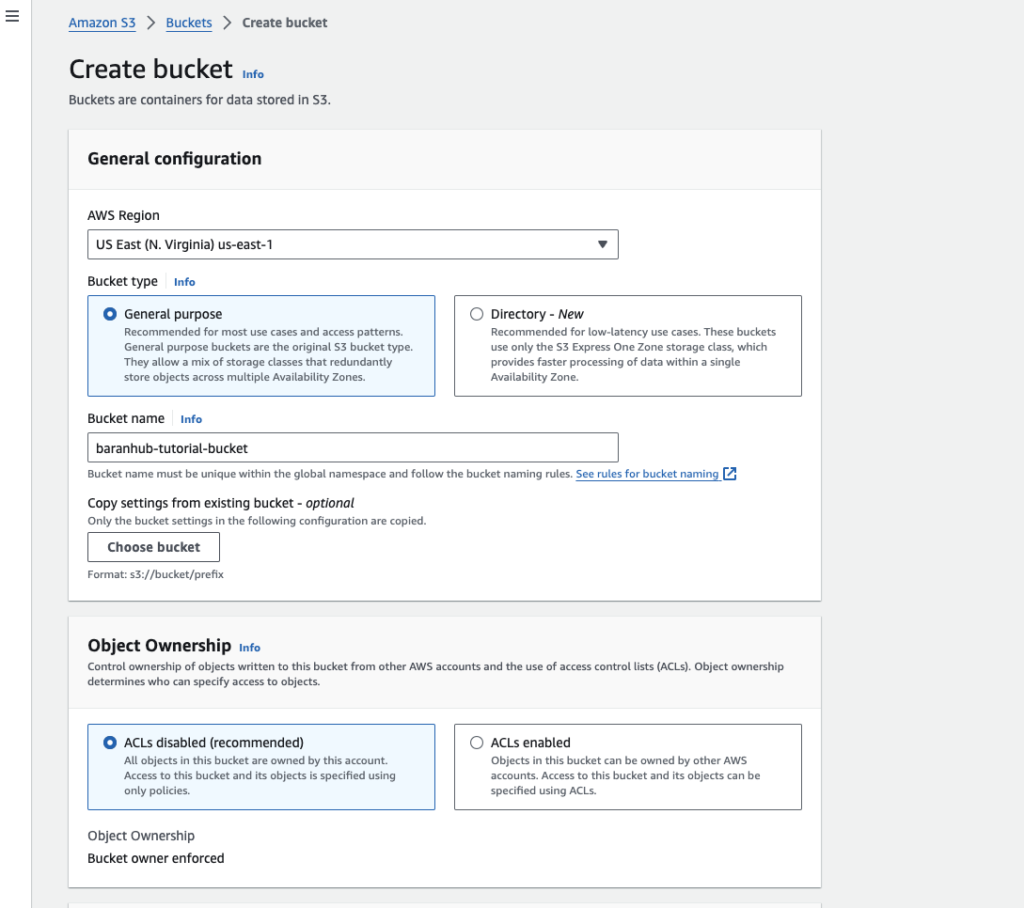
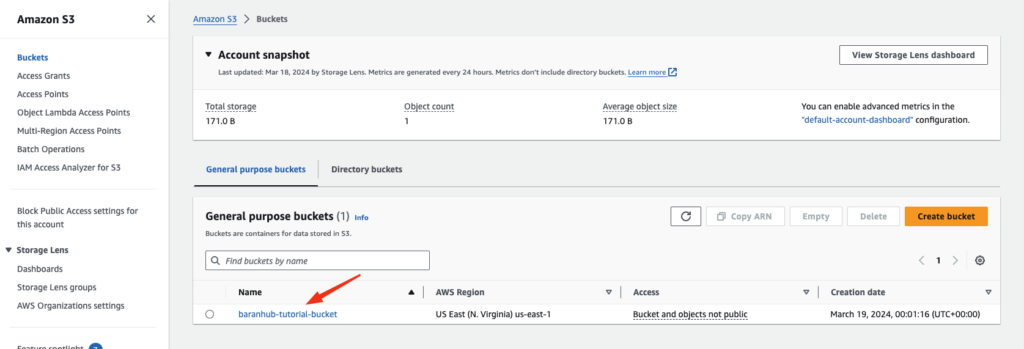
Step 1: Create an S3 Bucket
As an initial step, we need to create a bucket to store an original file which will be transformed with the lambda function. Buckets are the containers of objects.
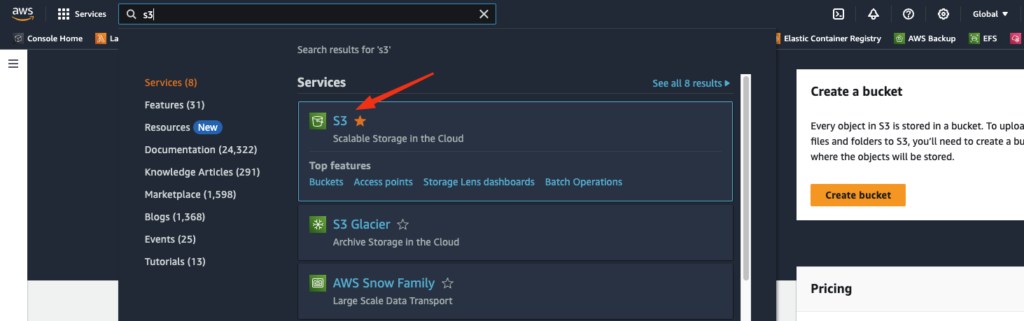
- Navigate to S3 Console.
- Choose “Create a bucket” on the page
- Choose the region where you want the S3 Bucket to reside. Buckets are created in a specific AWS region. Your data inside a bucket has a primary home region. It never leaves that region unless you specify. For this example, I chose us-east-1 regions which is North Virginia.
- Give an unique bucket name. For instance, baranhub-tutorial-bucket for your bucket
Some important points about bucket names:
- Bucket is identified by its name and it is globally unique. No-one else can use the same name.
- Can’t be IP formatted e.g. 1.1.1.1
- start with a lowercase letter or a number
For further information, please refer to https://docs.aws.amazon.com/AmazonS3/latest/userguide/bucketnamingrules.html
- Keep “Block all public access” active. All buckets by default are private. Nobody has permission to this bucket apart from the account that creates the bucket. Even if you untick that box, what it only does not means the bucket is public. But you still need to grand access to bucket. It just means that you can grant public access to this bucket.
- Keep the encryption as “Server-side encryption with Amazon S3 managed keys (SSE-S3)”
- Keep the rest of the settings as default.
- Choose “Create Bucket”
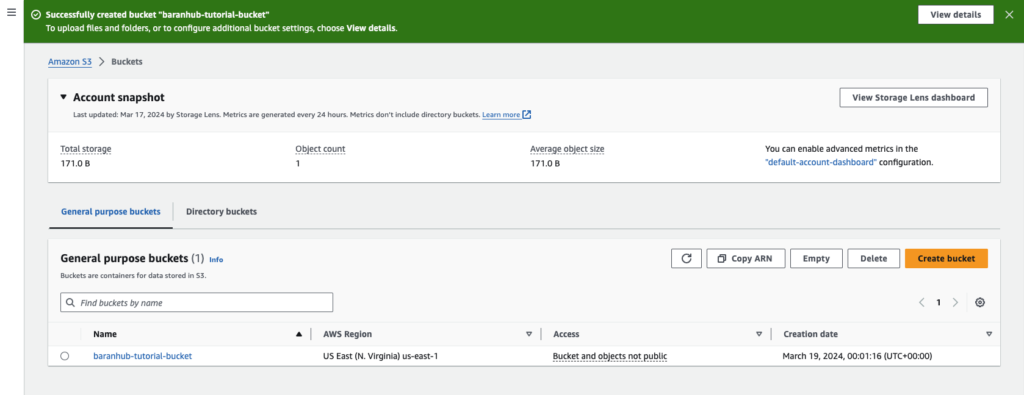
- Verify whether the bucket is created successfully.
Step 2 : Add a file to the bucket
In this step, we will create a file and upload it to the bucket.
For example, you can upload a “baranhub-S3ObjectLambda-tutorial.txt” file that contains the following text:
Empower Your Cloud Security Success
Discover expert advice to enhance security measures for your cloud migration. Take proactive steps with BaranHub.com.
Follow the steps below to upload the file to the bucket we created earlier
Steps:
- Navigate to S3 Console and choose the name of the bucket you created in the Step 1 (for example baranhub-tutorial-bucket ) to upload your file
- On the Objects tab, choose upload.
- On the Upload page, under Files and Folders, choose add files.
- Choose the file to upload and. For instance baranhub-S3ObjectLambda-tutorial.txt which is created earlier.
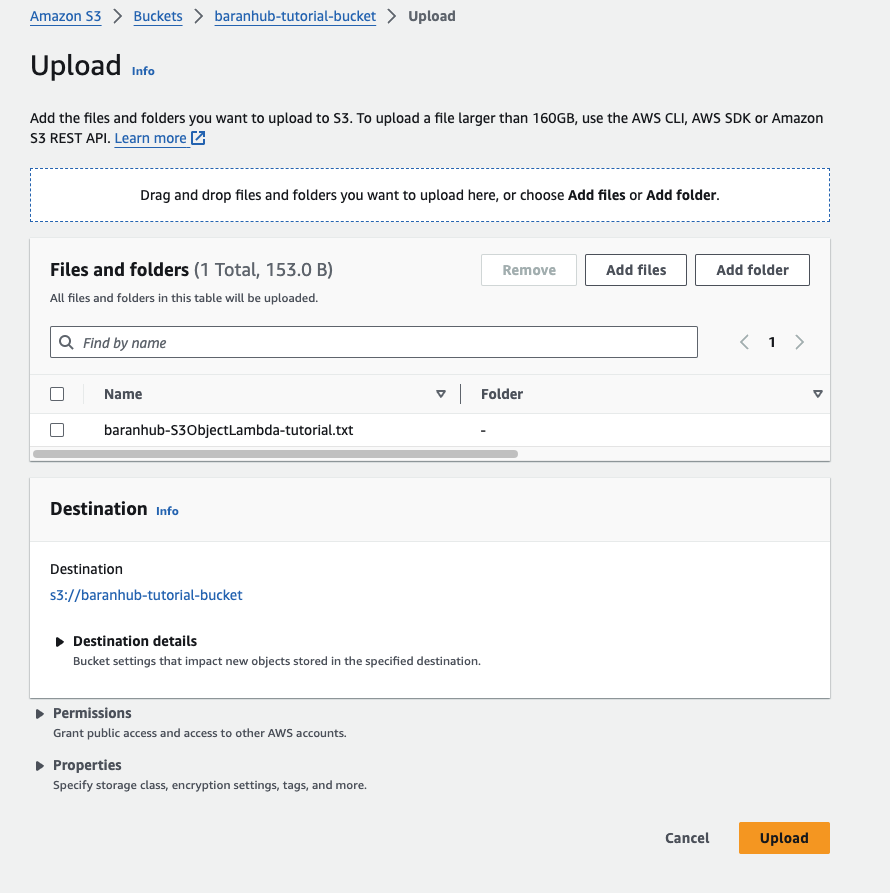
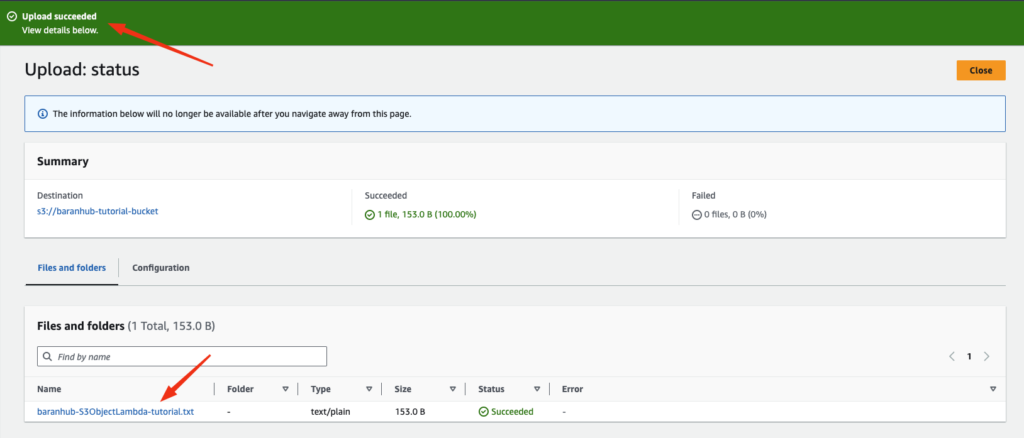
- Choose upload. You should see the “Upload succeed” notification on the green banner and the file should be listed in the Files and Folders
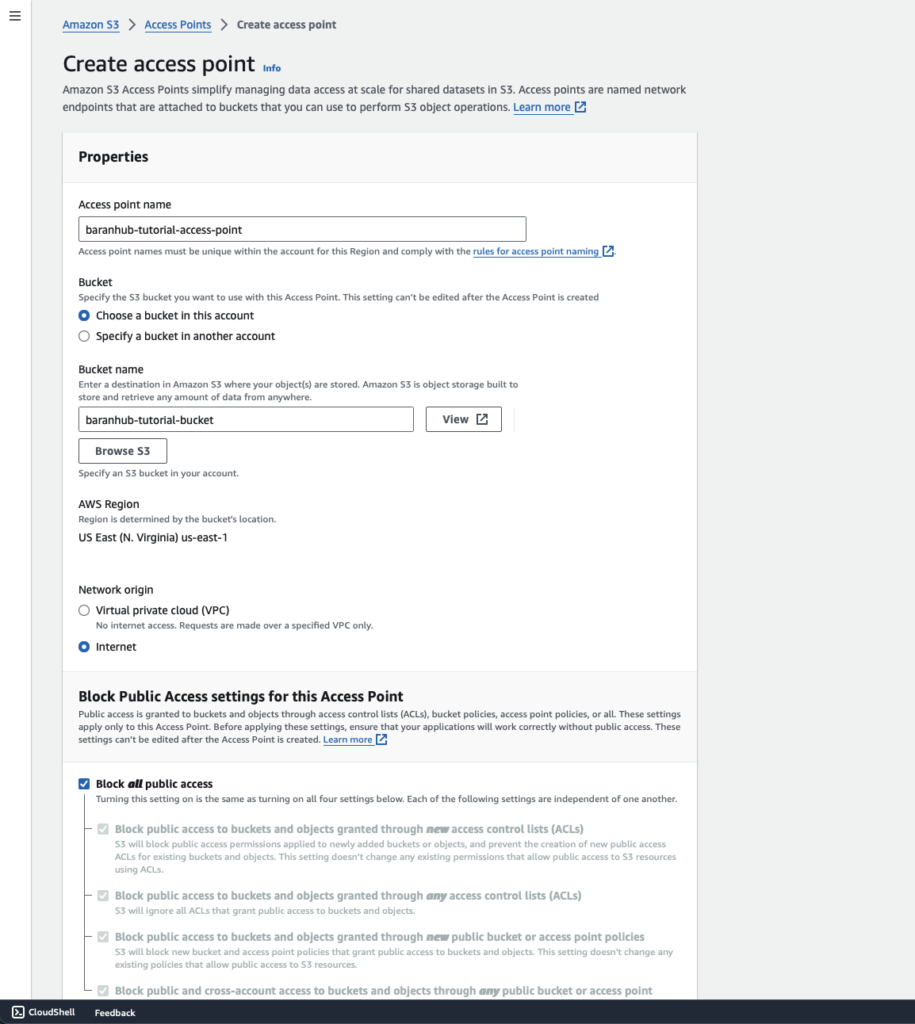
Step 3: Create an S3 access point
Amazon S3 Access Points, a feature of S3, simplifies managing data access at scale for applications using shared data sets on S3.
Access points are unique hostnames that you can create to enforce distinct permissions and network controls for any request made through the access point.
Basically you can create many access points to buckets and each access point can have different access policy.
For further details, visit the AWS documentation: https://aws.amazon.com/s3/features/access-points/
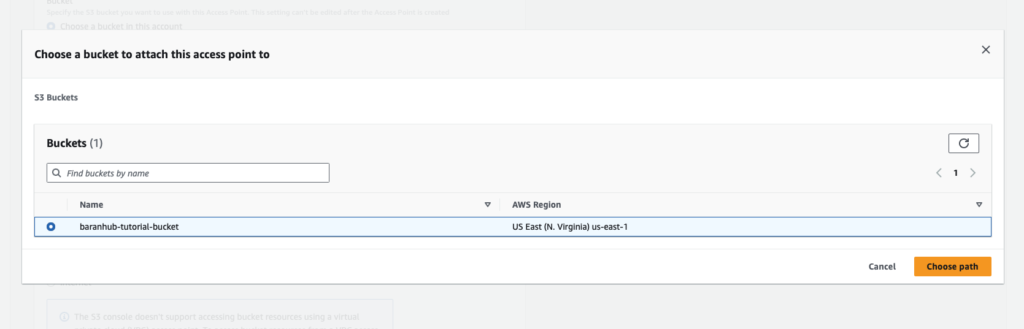
To use an S3 Object Access Point to access and transform the digital data, you must create and S3 access point and associate it with the S3 bucket that you create in Step 1.
To create an access point:
- Navigate to S3 Console and choose Access Point in the left navigation pane.

- On the Access Points page, choose Create access point.
- In the Access point name field, enter the name (for example, baranhub-tutorial-access-point) for the access point.
- Choose Browse S3 to browse and search the buckets in your account. Then confirm the choice with Choose Path
- When you create an access point, you can choose to make the access point accessible from the internet, or you can specify that all requests made through that access point must originate from a specific virtual private cloud (VPC). To restrict an access point to VPC-only access, you can choose Virtual private cloud (VPC) option and specify the VPC ID. In this tutorial, for Network origin, choose Internet.
- For all other access point settings, keep the default settings. Optional Step: Access point policy can be configured to manage access to your access point. For examples, please see Access point policy examples.
- Choose Create access point.
Step 4: Create a Lambda Function
In this step, I will create a Lambda function which is designed to get the file from S3 bucket and transform it. This Lambda function will be accessed via Object Lambda Access Point.
Step 4.1: Create the Lambda function code in your local virtual environment.
Note: You can clone the repository for the this tutorial form the following link: Baran-Hub Repository
Steps:
- Create requirements.txt file
boto3 == 1.34.64
requests == 2.31.0- Create a python file and call it as transformUppercase.py
- Paste the below code into that file and save it.
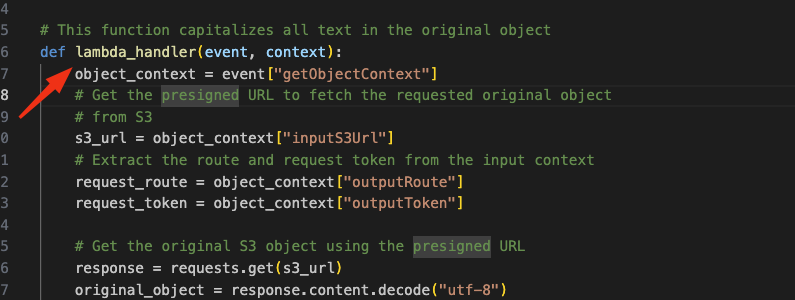
import boto3

def lambda_handler(event, context):
  """
  This Lambda function capitalizes all text in an S3 object retrieved via a presigned URL.
  """

  # Extract details from event context
  object_context = event["getObjectContext"]
  s3_url, request_route, request_token = object_context["inputS3Url"], object_context["outputRoute"], object_context["outputToken"]

  # Download original object using presigned URL
  s3_client = boto3.client('s3')  # Create s3 client directly
  with s3_client.download_fileobj(s3_url) as response:
    original_object = response.read().decode("utf-8")

  # Transform object (capitalize text here)
  transformed_object = original_object.upper()

  # Write transformed object back to S3
  s3_client.put_object(
      Body=transformed_object,
      RequestRoute=request_route,
      RequestToken=request_token
  )

  # Return success status
  return {'status_code': 200}
- In the terminal run the following commands to create a virtual environment and zip the library files.
# Create a python version environment
python3 -m venv venv
# Activate the virtual environment
source venv/bin/activate
# Install the requirements
pip3 install -r requirements.txt
# Deactivate the python virtual environment
deactivate
# Create a zip file from the library
cd venv/lib/python3.12/site-packages/
zip -r ../../../../TransformingData .
# Add transformUppercase.py file to the zip
cd -
zip -g TransformingData.zip transformUppercase.py - At the end, a zip file called TransformData.zip should be generated.

- The content of the zip file should be as below
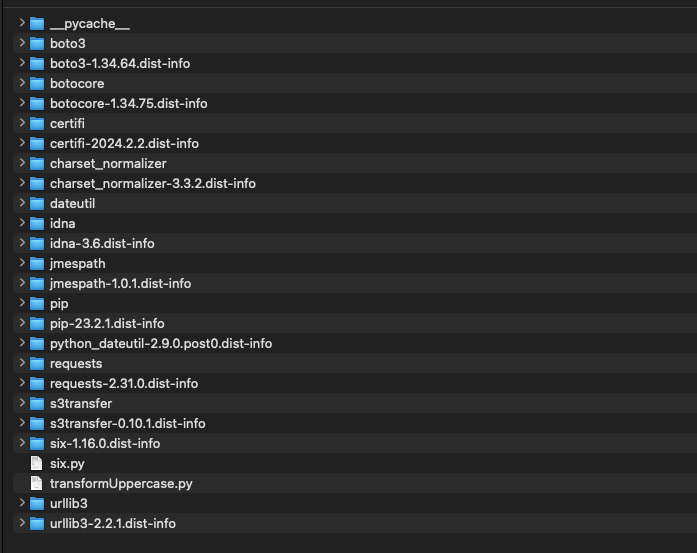
Step 4.2 – Create a Lambda Function with an execution role
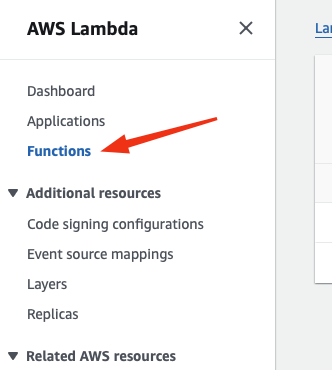
- Sign in to the AWS Management Console and open the AWS Lambda console at https://console.aws.amazon.com/lambda/.
- In the left navigation pane, choose Functions.
- Choose Create function.
- Under Basic information, do the following:
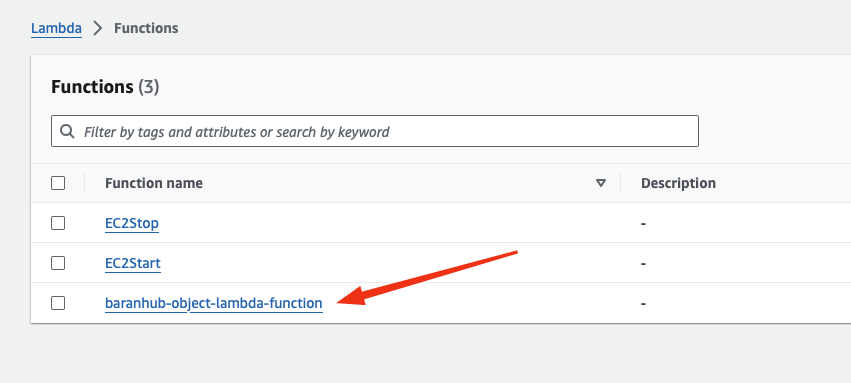
- For Function name, enter baranhub-object-lambda-function.
- For Runtime, choose Python 3.12.
- Choose arm64 as Architecture.
- Expand the Change default execution role section. Under Execution role, choose Create a new role with basic Lambda permissions. Later on this this tutorial, a permissions comes with a this new role will be attached. However if you are already have an existing role, this is a good example to reuse by selecting “Use an existing role”
- Keep the remaining settings set to the defaults.
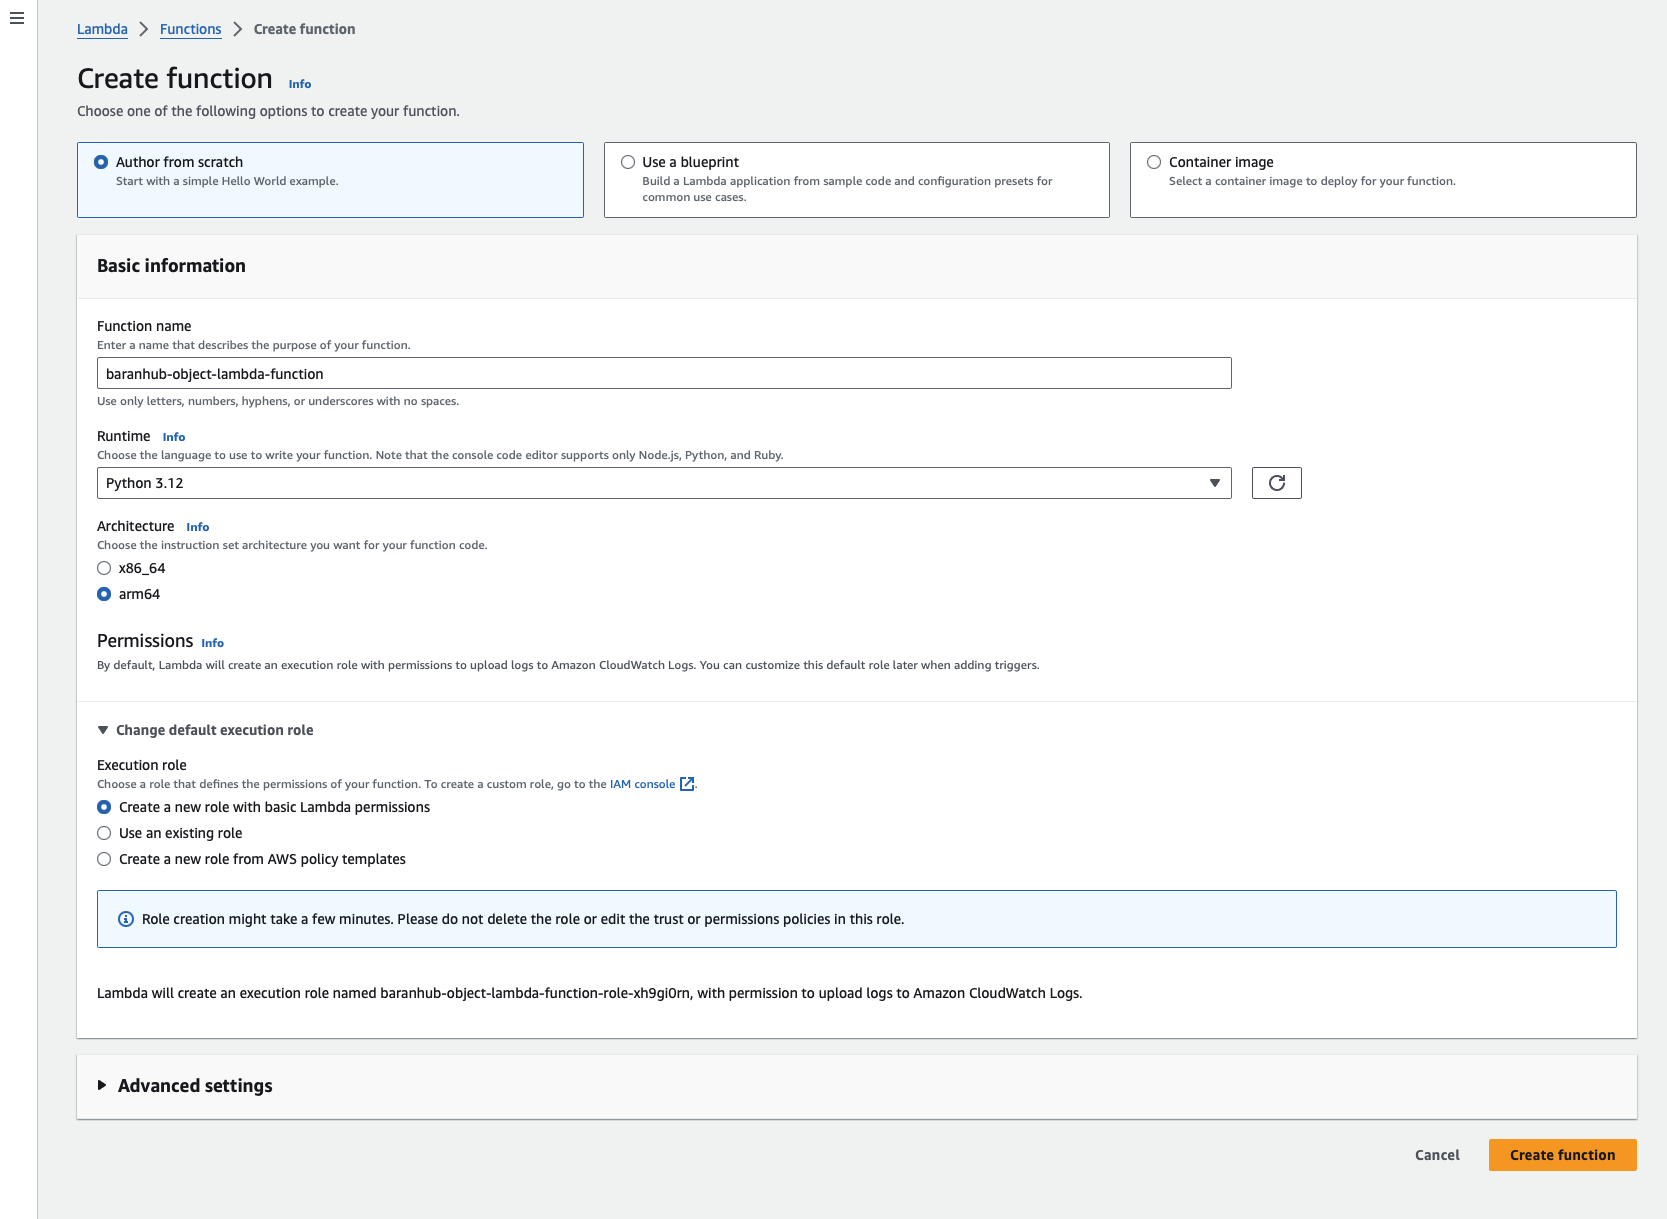
- Choose Create function.
4.3 – Deploy your Lambda function code with .zip file archives and configure the Lambda function (console)
- In the AWS Lambda console, choose the Lambda function (
baranhub-object-lambda-function)which is just created.
- Instead of writing the lambda function in here, I will upload the code created locally.
- Choose Upload from and then .zip file.
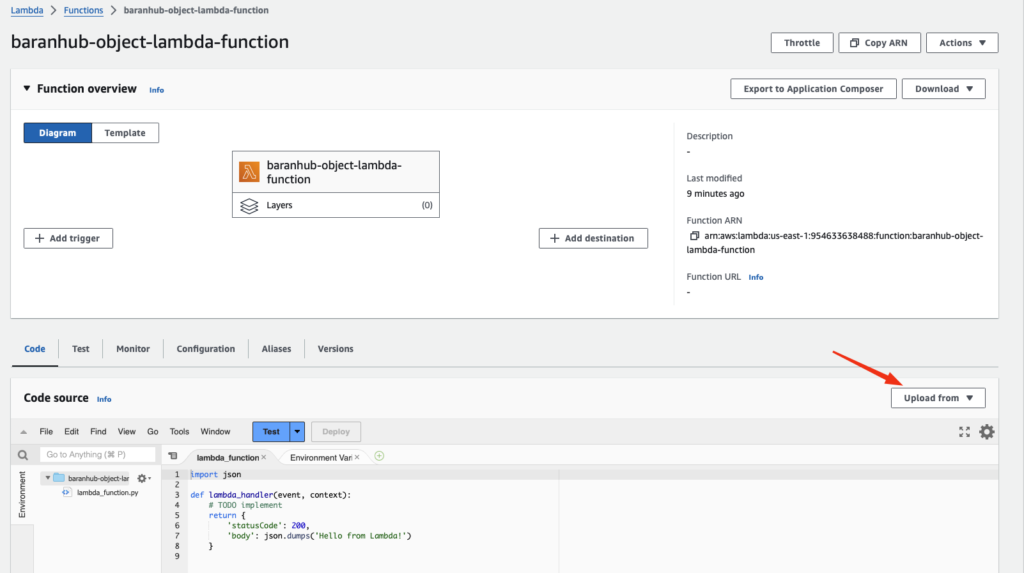
- Choose Upload to select your local
.zipfile. - Choose the TransformingData.zip file that you created earlier, and then choose Open.
- Choose Save.
- In the Runtime settings section, choose Edit.
- The next step is to tell the Lambda runtime which handler method in your Lambda function code to invoke, enter transform.lambda_handler for Handler.
Lambda Handler is basically is the name of the function defined in the code file which you want Lambda to run.
Details are available at the following link. https://docs.aws.amazon.com/lambda/latest/dg/python-handler.html
In Python, when setting up a function to be used with AWS Lambda, you specify a handler configuration. This configuration tells Lambda the exact location of the function it should run. It follows a format where the file name containing the function and the function’s name are separated by a dot.
For instance, if your function is called lambda_handler and defined in a file named transformUppercase.py, the handler configuration would be transform.lambda_handler. This tells Lambda to execute the lambda_handler function from the transformUppercase.py file.
- Choose Save.
- On your Lambda function’s details page, choose the Configuration tab. In the left navigation pane, choose General configuration, then choose Edit. In the Timeout field, enter
1min0sec.
💡 Lambda Timeout: Keeping Your Functions on Track
- What is it? Timeout is a safety measure in AWS Lambda that limits how long a function can run for a single execution (invocation). It prevents functions from getting stuck and potentially causing issues.
- Default and Maximum Duration: By default, Lambda functions have a timeout of 3 seconds. However, for functions used with S3 Object Lambda, the maximum duration is extended to 60 seconds. This extra time allows them to handle the processing of S3 objects.
- Cost Considerations: Remember, you pay for Lambda based on the memory allocated and the execution time of your function. Setting a lower timeout can help you optimize costs if your function finishes quickly.
In simpler terms, timeout acts like a timer for your Lambda functions. It ensures they complete their job efficiently, keeping your costs in check. The extended timeout for S3 Object Lambda functions provides more breathing room for handling object processing tasks.
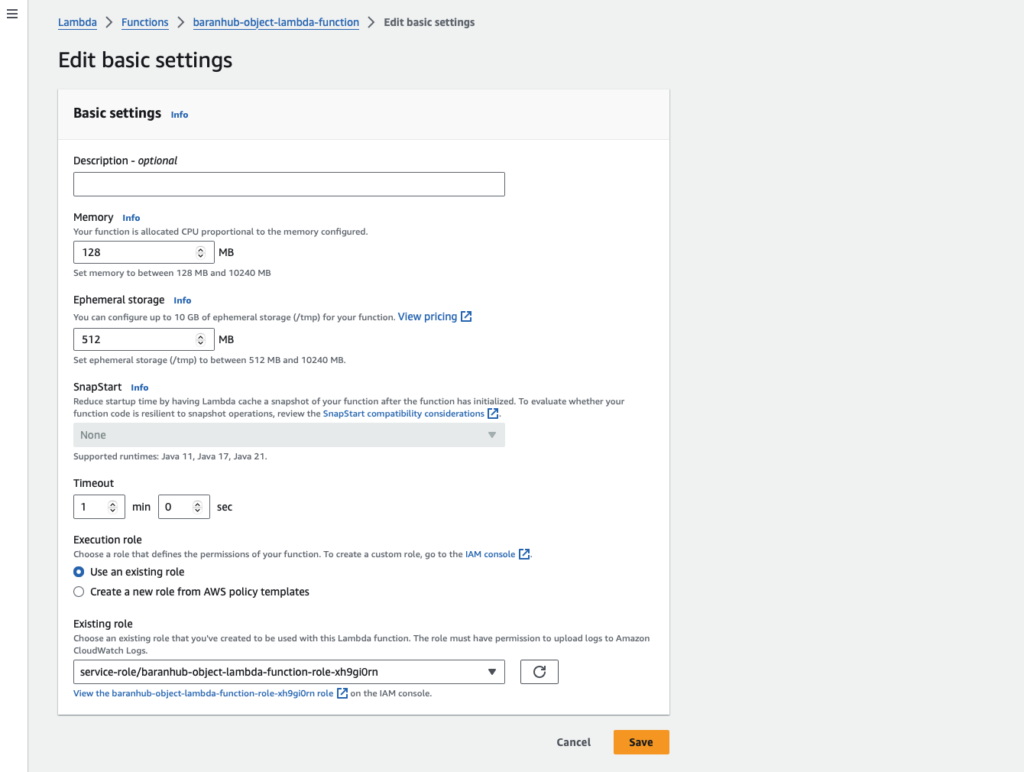
- Keep the remaining settings set to the defaults, and choose Save.
Step 4.4 (Optional) – Inspect the AWS SAM File.
The SAM file can be downloaded from inside the Lambda function.
Navigate to Lambda function which you are created and choose Download AWS SAM File.
In the Handler is correctly pointed to transform.lambda_handler . Additionally in the policies section, the right privilege to allow lambda function to make a GetObject Api call is added as s3-object-lambda:WriteGetObjectResponse
Step 5: Configure an IAM policy for your Lambda function’s execution role
💡 The security for a Lambda functions is controlled using Execution Roles and there are IAM roles assumed by the Lambda Function which allows Lambda function to interact with other AWS products.
To enable your Lambda function to provide customized data and response headers to the GetObject caller, your Lambda function’s execution role must have IAM permissions to call the WriteGetObjectResponse API.
To attach an IAM policy to your Lambda function role
- Choose the lambda function you created earlier.
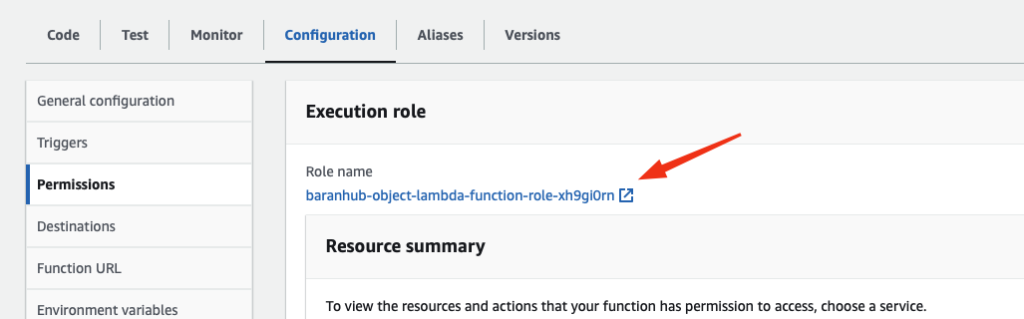
- On your Lambda function’s details page, choose the Configuration tab, and then choose Permissions in the left navigation pane.
- Under Execution role, choose the link of the Role name. The IAM console opens.
- The IAM console opens.
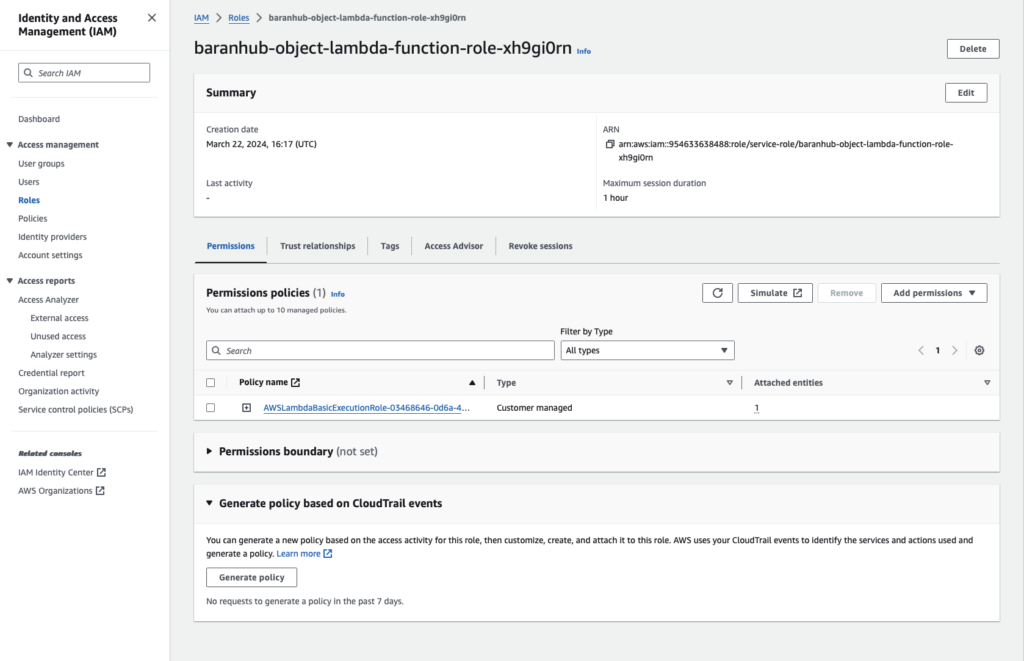
- On the IAM console’s Summary page for your Lambda function’s execution role, choose the Permissions tab. Then, from the Add Permissions menu, choose Attach policies.
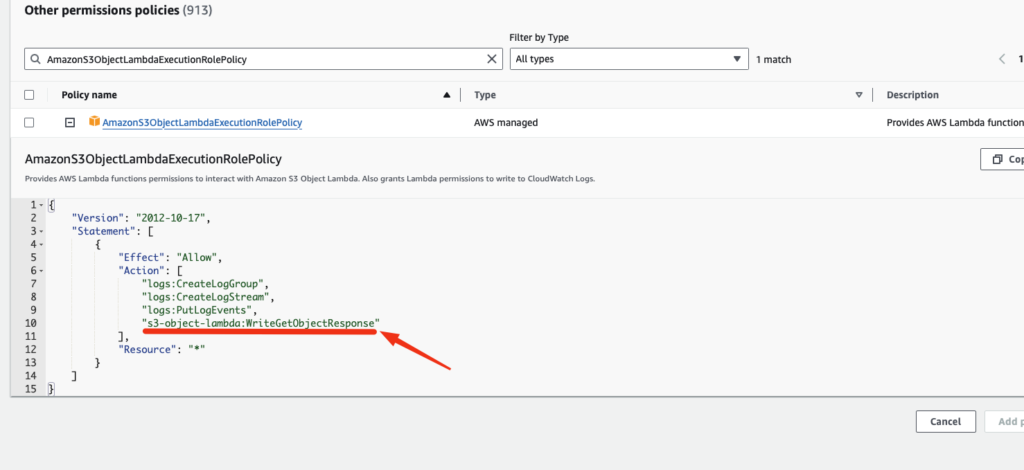
- On the Attach Permissions page, enter AmazonS3ObjectLambdaExecutionRolePolicy in the search box to filter the list of policies. Select the check box next to the name of the AmazonS3ObjectLambdaExecutionRolePolicy policy.

The permission I am mostly interested here to allow s3-object-lambda:WriteGetObjectResponse.
- Choose Attach policies.
Step 6: Create an Object Lambda Access Point
Think of an S3 Object Lambda Access Point as a concierge for your S3 bucket. Instead of directly accessing objects, applications can go through this access point.
In a nutshell, S3 Object Lambda Access Points eliminate the need for complex code for each file access. They automatically trigger data processing through your chosen Lambda function, making your S3 bucket more intelligent and efficient.
To create an S3 Object Lambda Access Point
- Navigate to AWS S3 console.
- In the left navigation pane, choose Object Lambda Access Points.
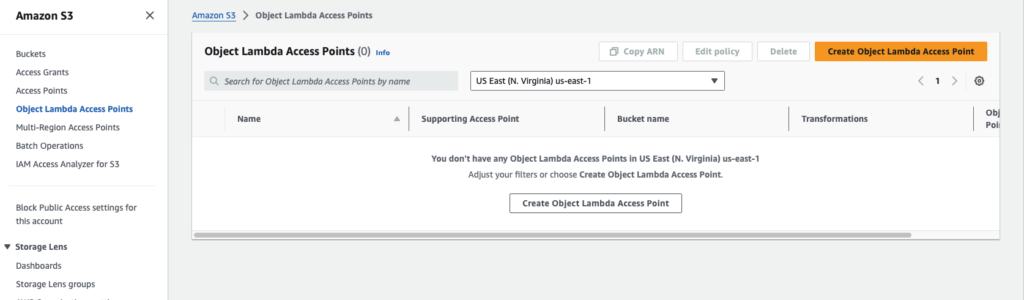
- On the Object Lambda Access Points page, choose Create Object Lambda Access Point.
- For Object Lambda Access Point name, enter the name that you want to use for the Object Lambda Access Point (for example, baranhub-tutorial-object-lambda-accesspoint).
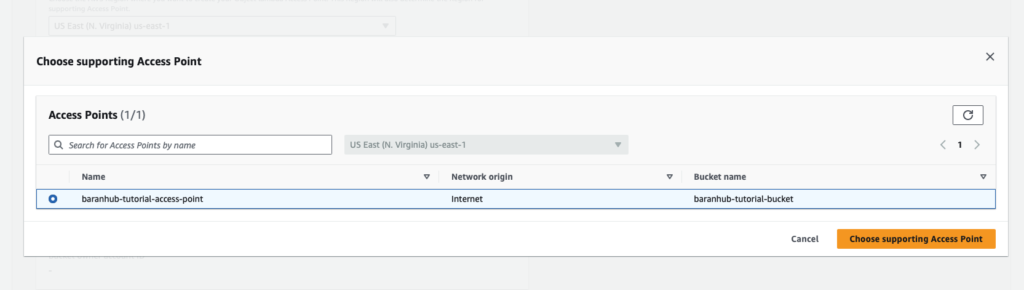
- For Supporting Access Point, enter or browse to the standard access point that you created in Step 3 (for example, baranhub-tutorial-access-point), and then choose Choose supporting Access Point.
- Choose the GetObject api for S3 and the lambda function which was created in earlier steps.
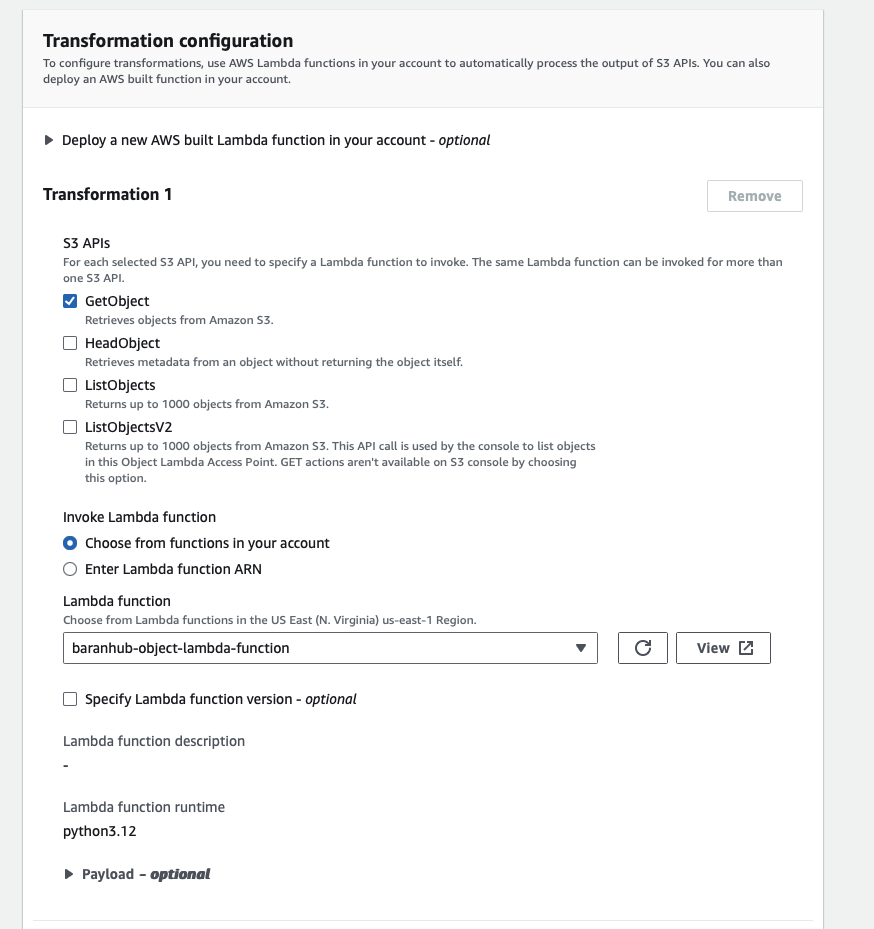
- For Lambda payload, leave it empty. If your function can accept any input, this is the place to configure. A payload is optional JSON text that you can provide to your Lambda function as input for all invocations coming from a specific S3 Object Lambda Access Point.
- Keep the rest of the settings as they are.
- Choose “Create Object lambda Access Point”.
Step 7: Test the transformed data
Now, it is the time to put the system in test. S3 Object Lambda is supposed to transform the content of the file in S3 bucket and transform all the text to uppercase.
Initially check if the lambda function perform as it is expected. Later on, a python script will used to interact with the S3 Object Lambda.
Method A – Test the transformed data in your S3 Object Lambda Access Point
💡 Under the Hood: How S3 Object Lambda Access Points Work Their Magic
Imagine you’re fetching a file from your S3 bucket, but behind the scenes, some cool stuff is happening:
- Request Sent: You (or your application) requests the file through the S3 Object Lambda Access Point, just like a regular S3 download.
- Access Point Steps In: The access point intercepts the request and triggers a special service called S3 Object Lambda.
- Lambda to the Rescue: S3 Object Lambda then fires up your predefined Lambda function, which is like a mini-program designed for this specific task.
- Data Makeover (Optional): If your Lambda function is configured to process the data, it will do so now. This could involve resizing images, anonymizing documents, or changing file formats.
- Delivery Time: Finally, S3 Object Lambda returns the data – either the original file or the processed version – as the response to your original S3
GetObjectrequest.
Steps:
- Navigate to S3 Console.
- In the left navigation pane, choose Object Lambda Access Points.
- On the Object Lambda Access Points page, choose the baranhub-tutorial-object-lambda-accesspoint which was created earlier.
- On the Objects tab, choose the file and click on Open or Download.
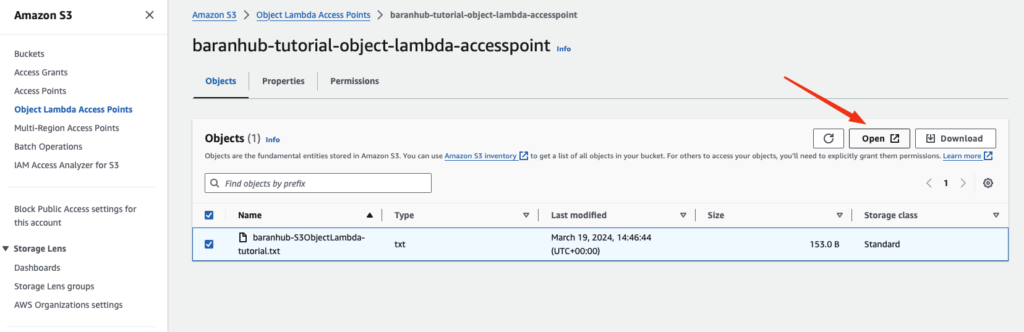
This file should contain all the transformed data.
As you can see, the the text is returned as UpperCase.

- To view the transformed data, choose Open or Download.
Method B – Run a Python script to print the original and transformed data
The beauty of S3 Object Lambda is that it plays nicely with your current applications. No need to rewrite everything! Here’s what you do:
- Update App Configuration: Simply modify your application’s settings to use the new S3 Object Lambda Access Point ARN (like a unique identifier) you created earlier. This tells your app to fetch data through the access point instead of directly from the S3 bucket.
- See the Magic: To showcase this, the provided Python script demonstrates the difference. It fetches the original data from the bucket and then retrieves the transformed data delivered through the S3 Object Lambda Access Point. You can see the power of on-the-fly processing in action!
Steps:
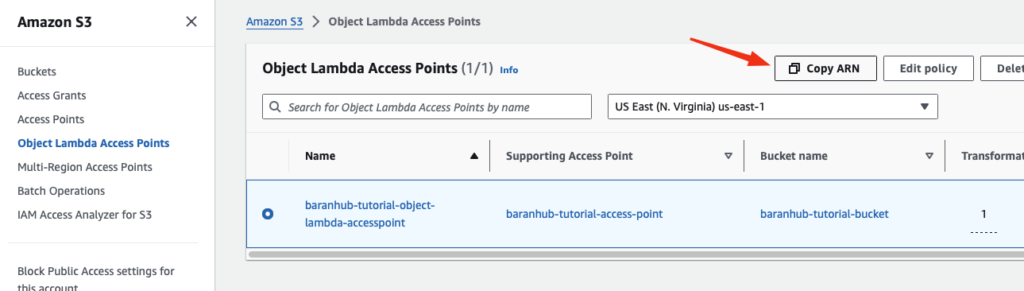
- Sign in to the AWS Management Console and open the Amazon S3 console at https://console.aws.amazon.com/s3/.
- Choose Copy ARN of your Object Lambda access point.

- Write a Python script on your local machine to print both the original data (for example,
baranhub-S3ObjectLambda-tutorial.txt) from your S3 Bucket and the transformed data (for example,baranhub-S3ObjectLambda-tutorial.txt) from your S3 Object Lambda Access Point). You can use the following example script.
import boto3
from botocore.config import Config

s3 = boto3.client('s3', config=Config(signature_version='s3v4'))

def getObject(bucket, key) -> None:
    objectBody = s3.get_object(Bucket = bucket, Key = key)
    print(objectBody["Body"].read().decode("utf-8"))
    print("\n")

print('Original object from the S3 bucket:')
getObject(bucket="baranhub-tutorial-bucket", key="baranhub-S3ObjectLambda-tutorial.txt")

print('Object transformed by S3 Object Lambda:')
# Replace the ARN of your S3 Object Lambda Access Point that you saved earlier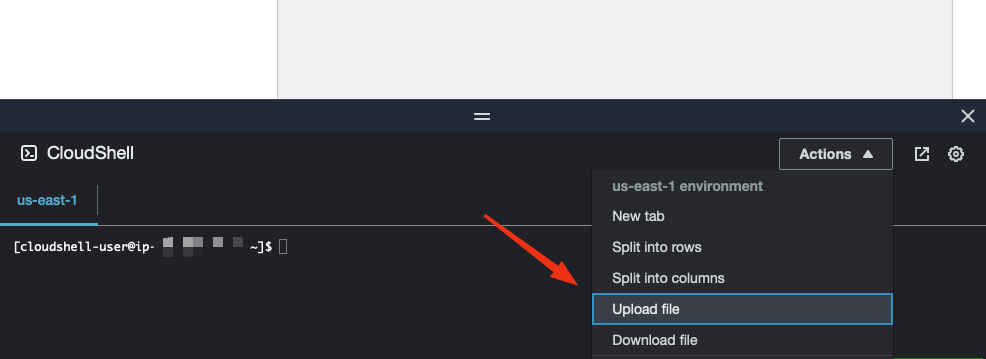
getObject(bucket="arn:aws:s3-object-lambda:us-east-1:954633638488:accesspoint/baranhub-tutorial-object-lambda-accesspoint",key="baranhub-S3ObjectLambda-tutorial.txt")- Upload the file to your CloudShell console.
- Check if the file is uploaded in the local directory.
- Then run the python script. As it can be seen in the output the lambda function transformed the text and printed it out as all uppercase.
- Likewise your application can use this lambda access point to access S3 objects in secure and practical way.
Remember: This is just the beginning! S3 Object Lambda unlocks a powerful way to manage and process your S3 data efficiently. With some exploration and practice, you can leverage it to create intelligent and automated workflows for your applications.